Adding an API connector plugin
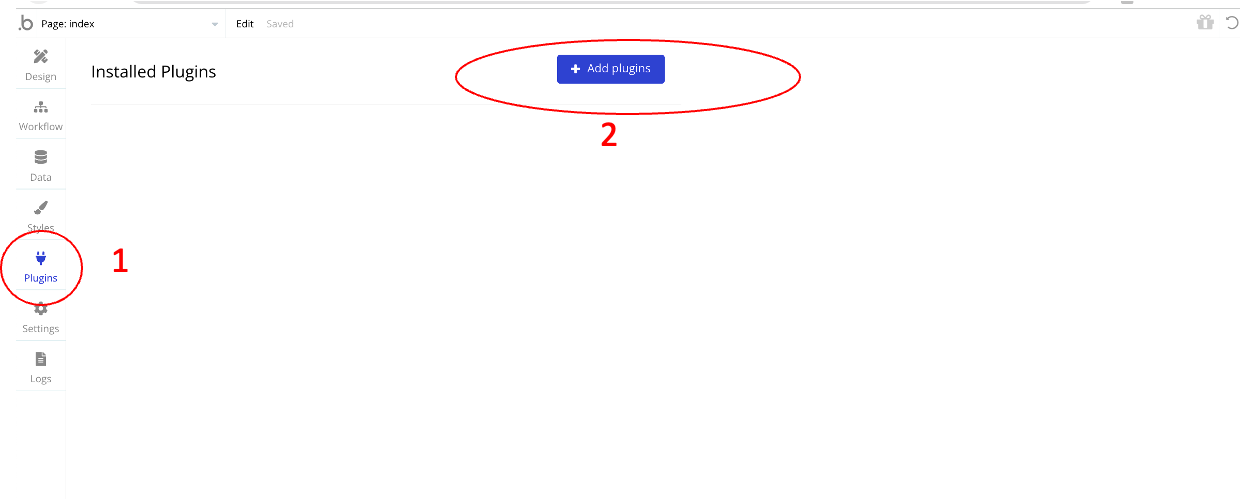
First, you need to add a new plugin to your project by clicking "+ Add plugins"
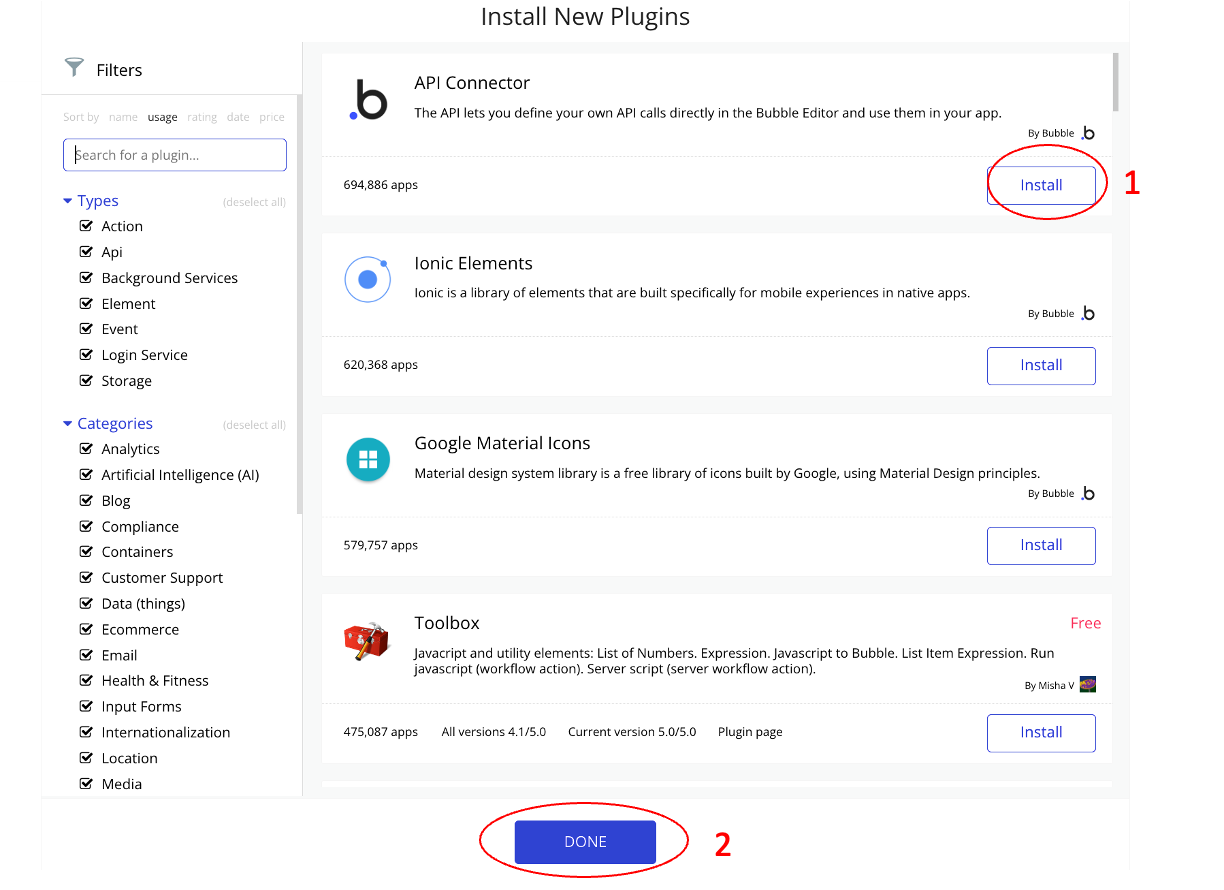
Then, install the API Connector
.API Connector allows you to seamlessly integrate external APIs into your Bubble application, enabling you to retrieve and send data, perform actions, and leverage the functionalities of various web services. We will use this feature to call Gladia's pre-recorded API to retrieve transcription.
Configuring the API connector
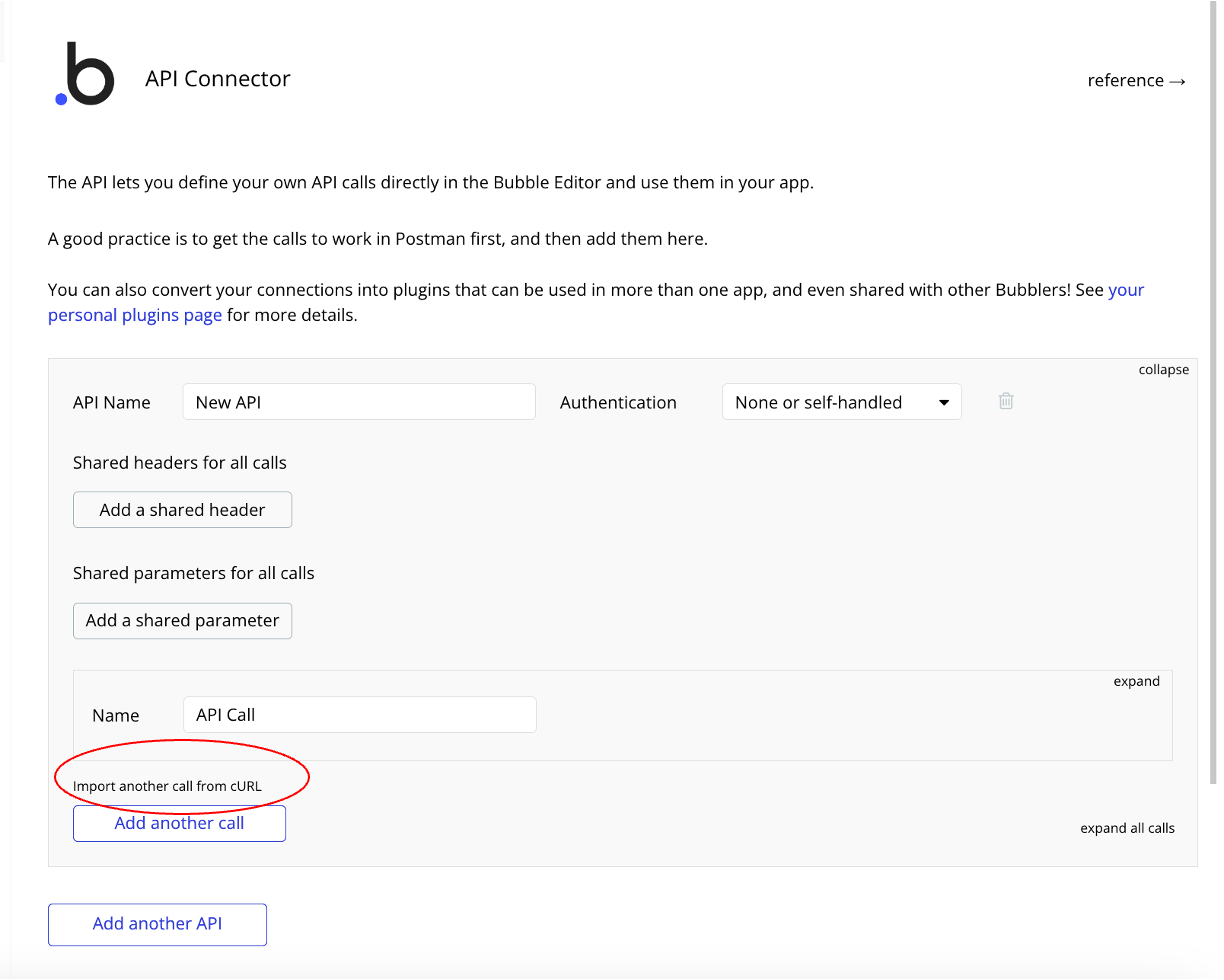
The easiest way to insert an API configuration without too much work is to copy-paste a cURL command.
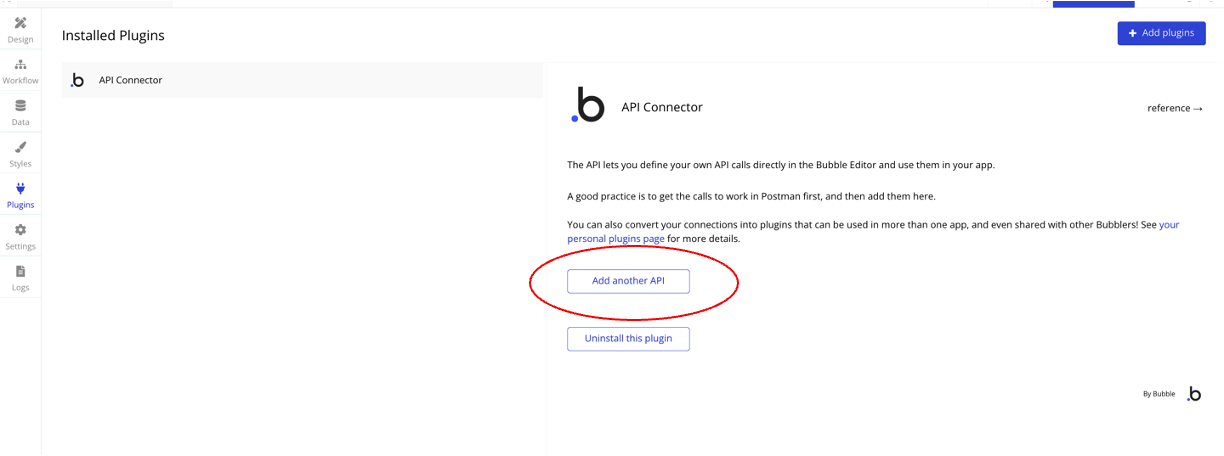
Click on import another call from cURL.
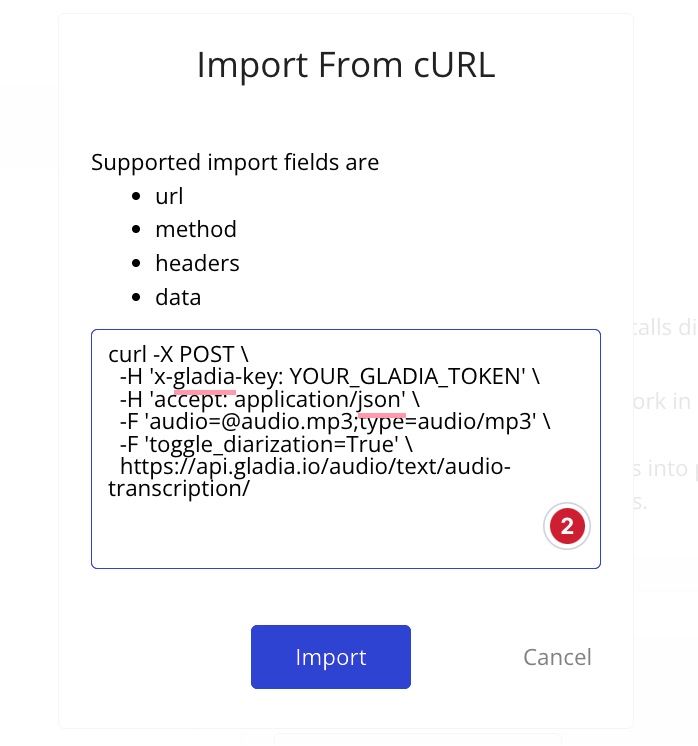
In the popup, paste the following cURL command.
curl -X POST \
  -H 'x-gladia-key: YOUR_GLADIA_TOKEN' \
  -H 'accept: application/json' \
  -F '[email protected];type=audio/mp3' \
  -F 'toggle_diarization=True' \
  https://api.gladia.io/audio/text/audio-transcription/
Adjust the API connector configuration
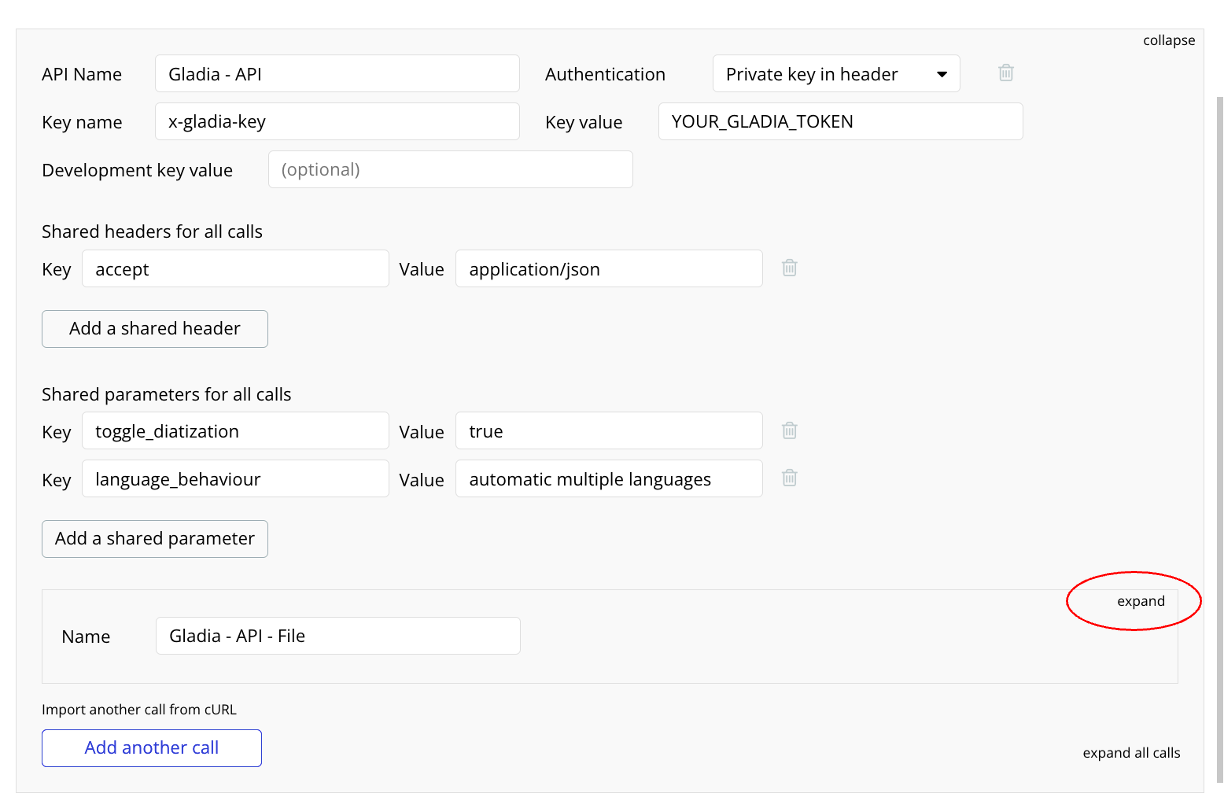
Set the shared Headers configuration
- change the Authentication method to private key in header
- add a key name in the header to be x-gladia-key and set the key value to be your free Gladia token available in the Gladia portal https://app.gladia.io/
- add a shared header for all API call to be the accept response format to application/json
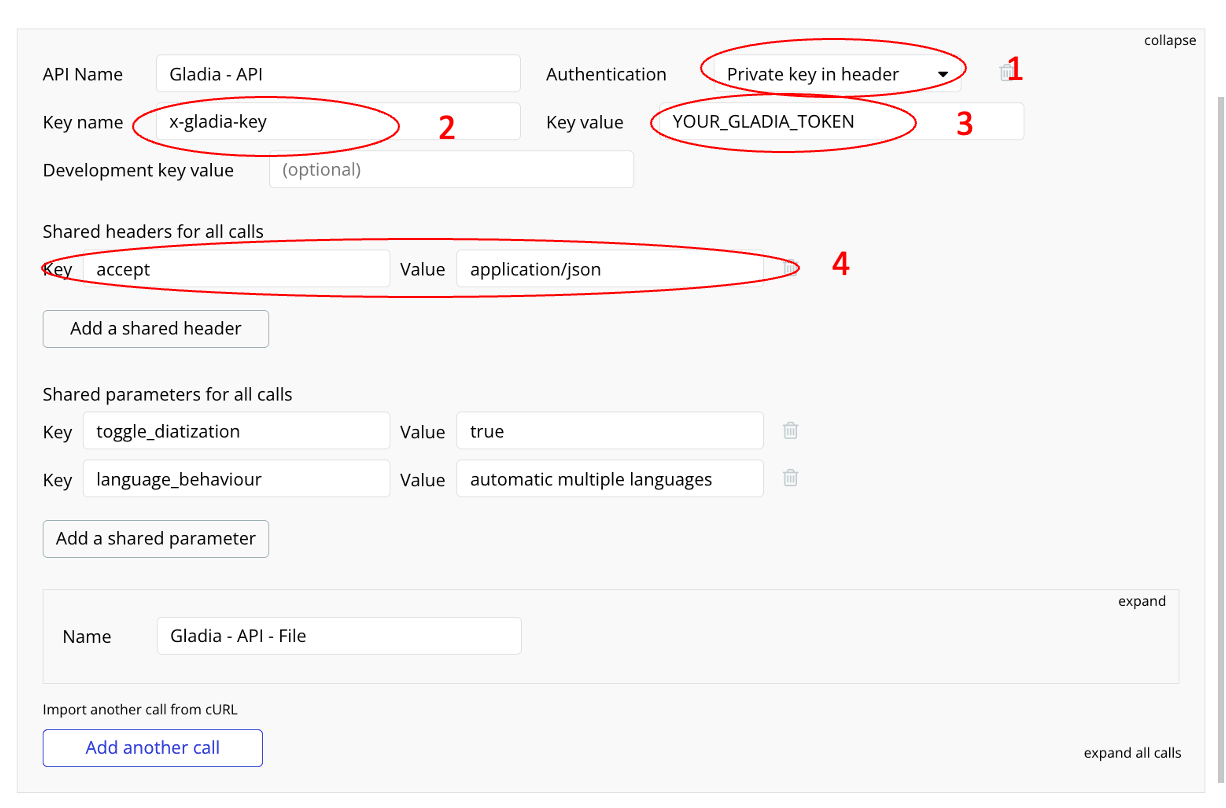
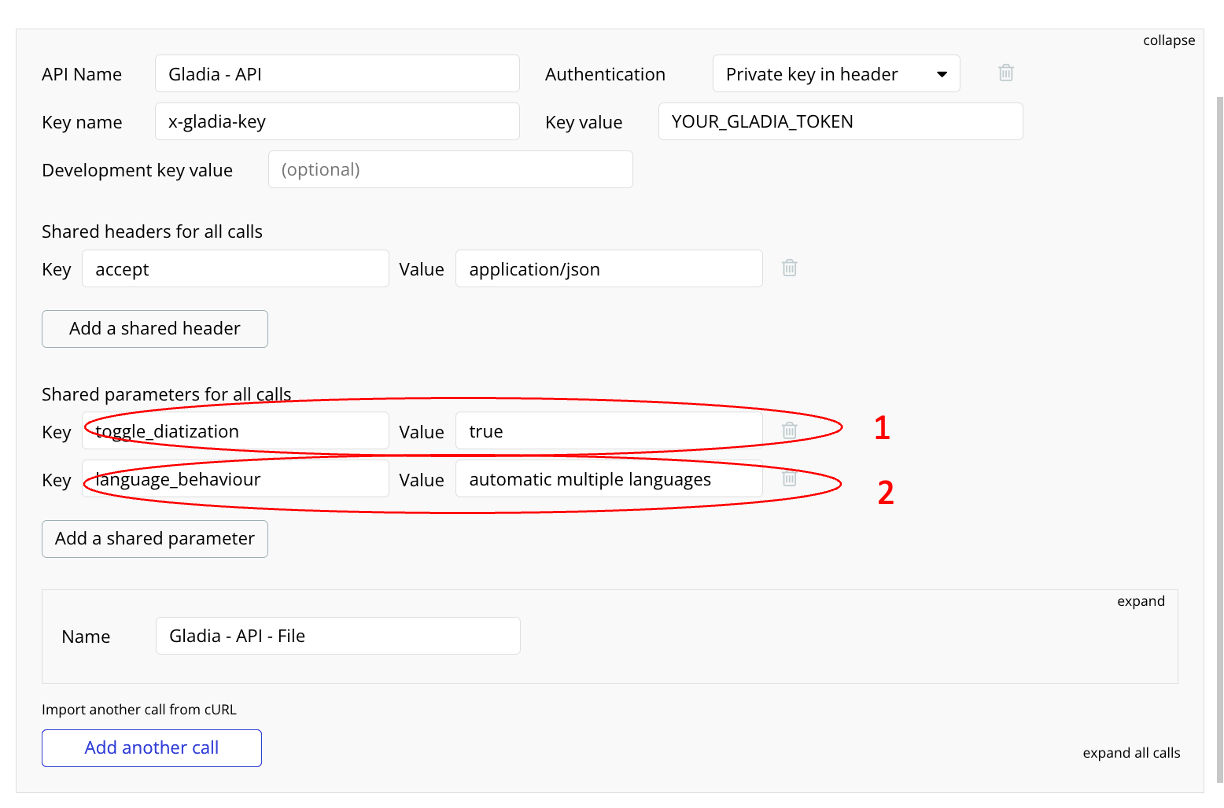
Set the shared Parameters configuration (optional)
- Add a shared header for all calls to set the toggle_diarization to true to activate the speaker separation.
- Add a shared header for all calls to set the language_behaviour to be the same for all API calls, such as automatic multiple languages, to ensure you activate the code-switching option (multi-lingual audio).
Configure the Speech To Text API
We will now set up 2 APIs. The first one will be configuring the file upload version using the audio field the second one will be the file URL version using audio_url field.
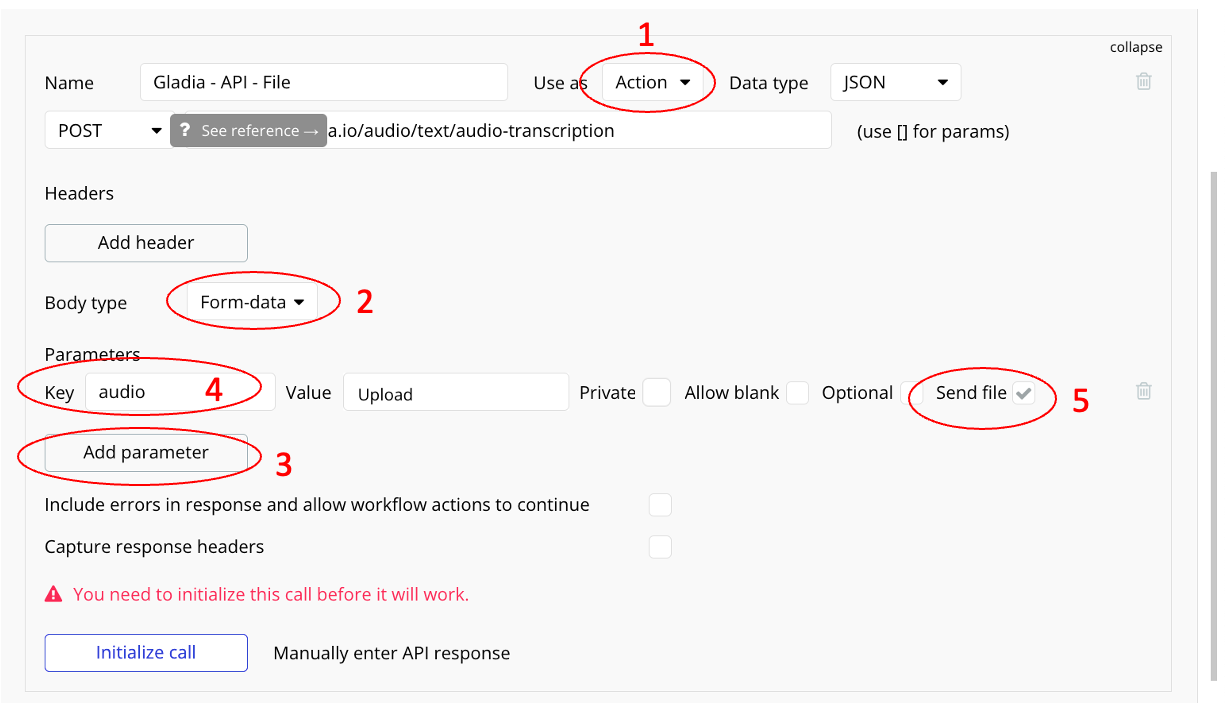
Using audio file upload version
This one is meant to send a raw file using an upload component.
Click expand to access the API configuration.
Adjust the API parameters
- Change Use as to Action
- Set the Body type to Form-data
- Add a new parameter named audio, then check the Send file option.
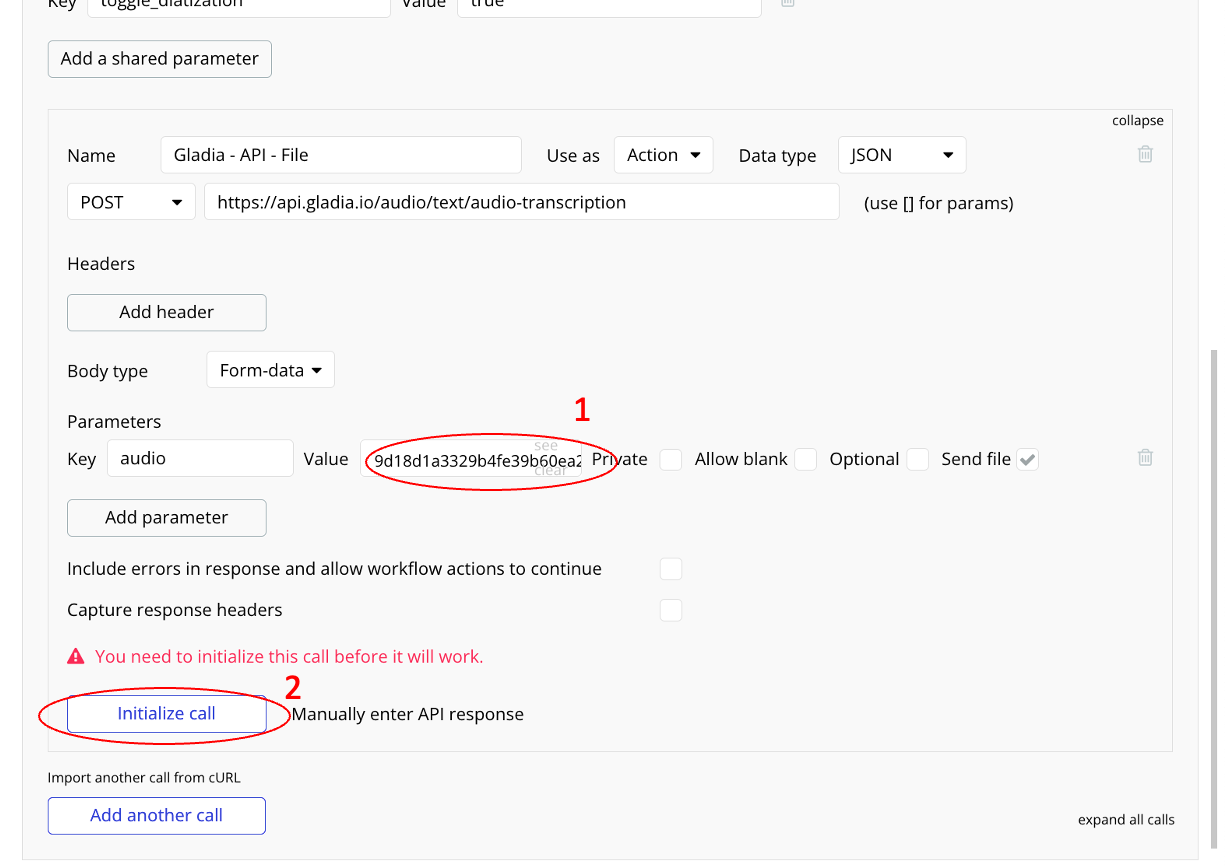
Initialize the call
you are almost there:
- you need to upload a file by clicking on the Upload field and select a valid audio file from your computer.
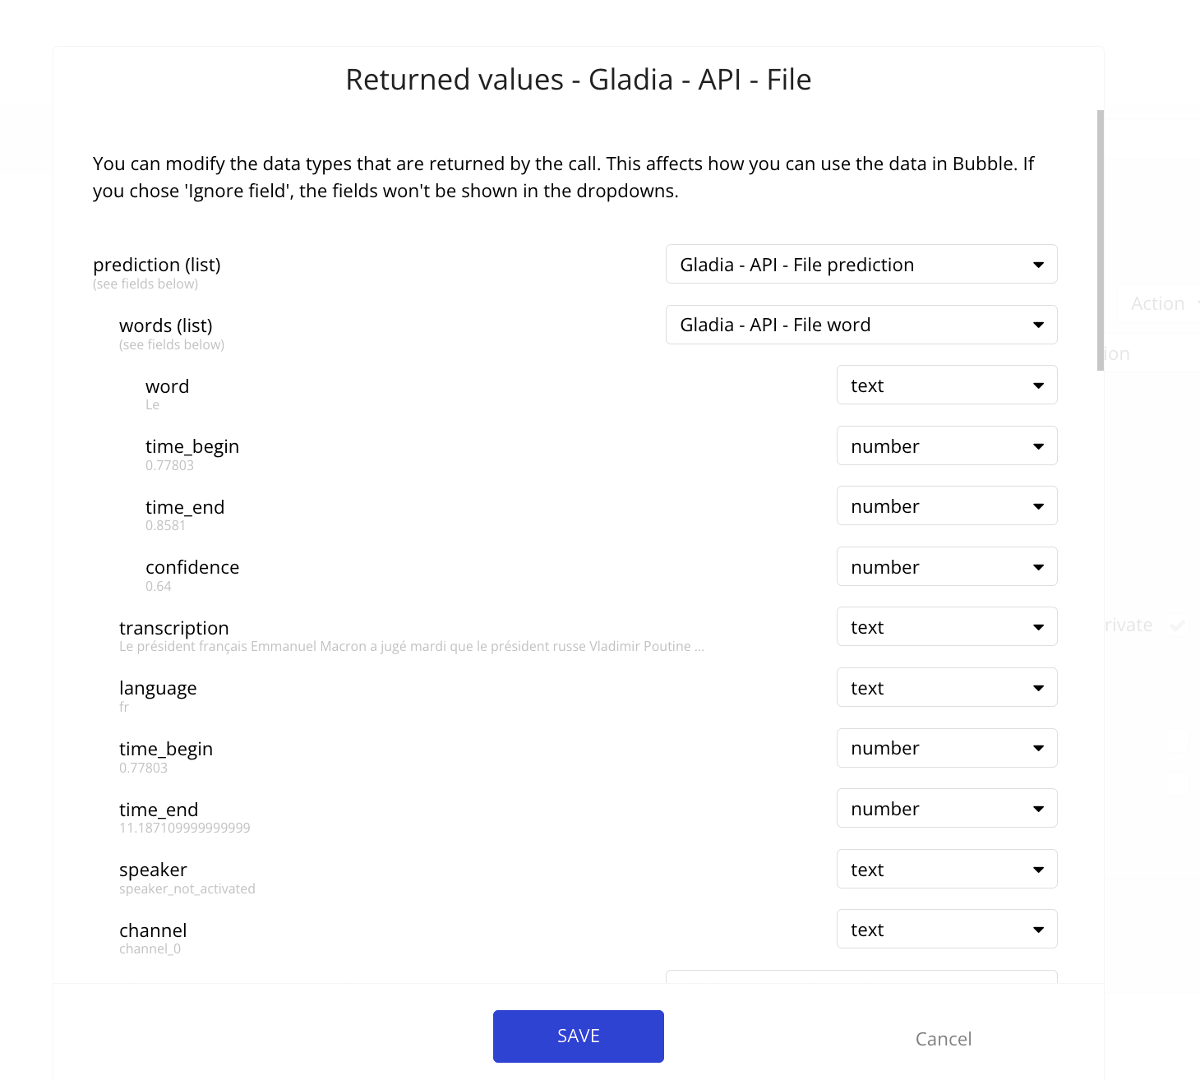
- Click Initialize call to force the first execution of the API to let Bubble self-discover the output JSON schema.
When done performing the initialization with the API, the schema is displayed; click Done; you can now use Gladia's API in Bubble.

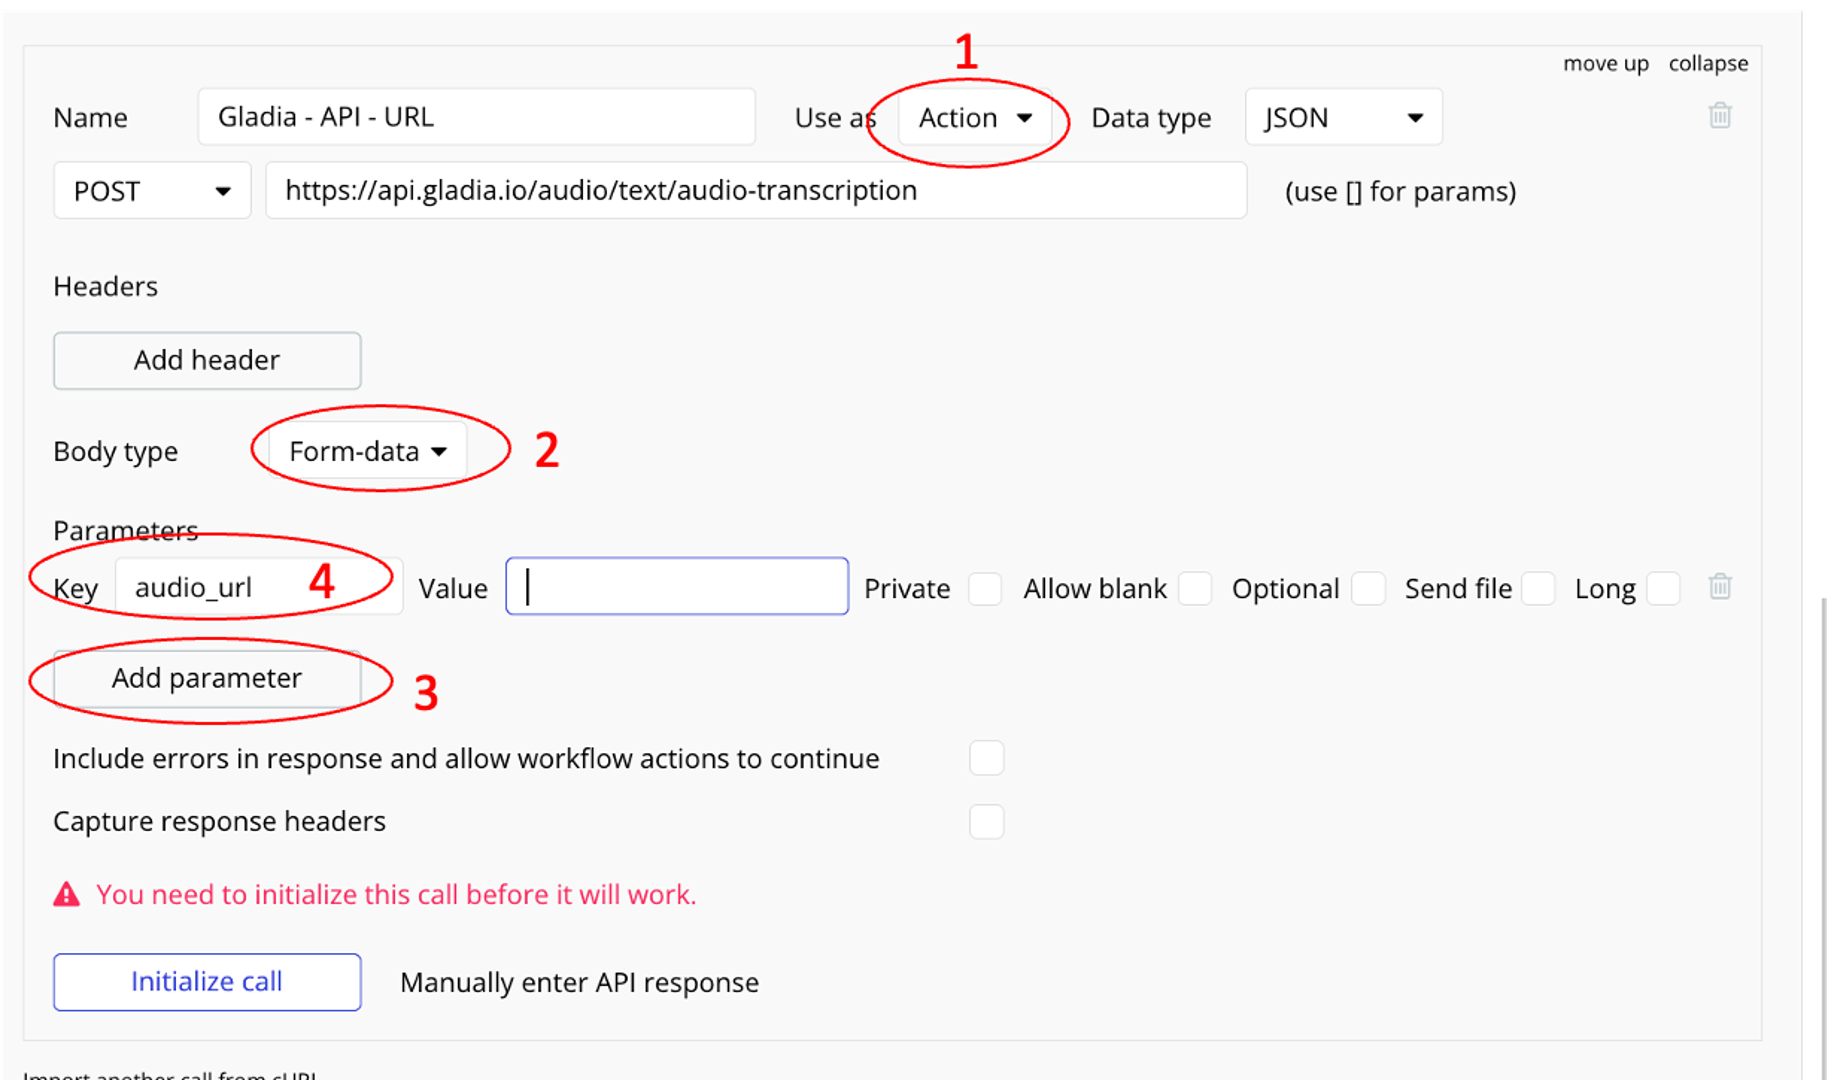
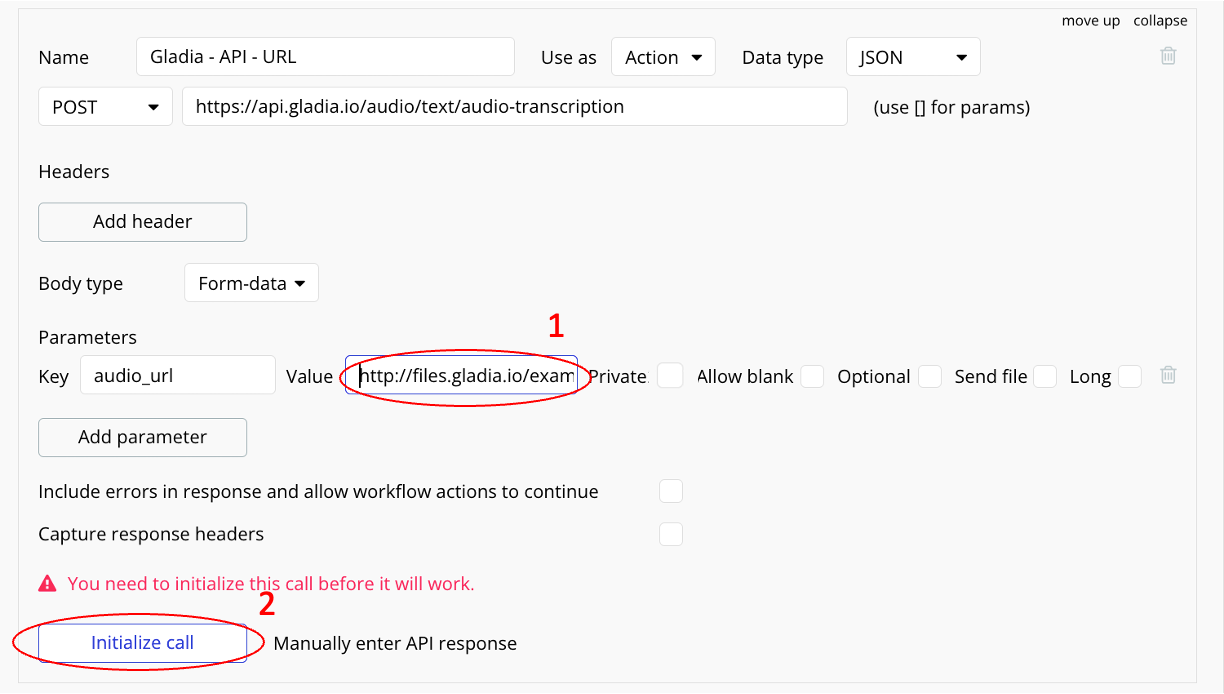
Using audio file URL version
This one is meant to send just a like of a valid file available on the internet: this includes all audio supported formats or any valid social media URL.
Click expand to access the API configuration.
Adjust the API parameters
- Change Use as to Action
- Set the Body type to Form-data
- Add a new parameter named audio_url, leave the value blank for now.
Initialize the call
you are almost there:
- you need to give an example URL of a valid file to initialize the call; you could use, for instance: http://files.gladia.io/example/audio-transcription/split_infinity.wav
- Click Initialize call to force the first execution of the API to let Bubble self-discover the output JSON schema.
When done performing the initialization with the API, the schema is displayed; click Done; you can now use Gladia's API in Bubble.